MIR4 Enhancement Success Rates by Step
For weapons, armour and accessories, enhancing in MIR4 always succeeds up to +4 and succeeds half the time at +5, and later steps get riskier.
Overview
For weapons, armour and accessories, enhancing in MIR4 always succeeds up to +4 and succeeds half the time at +5, and later steps get riskier. The in-game Enhance screen shows only the next step's chance, while the enhancement tool shows any step of any item with the fees each attempt costs.
How does the success chance change from +1 to +12?
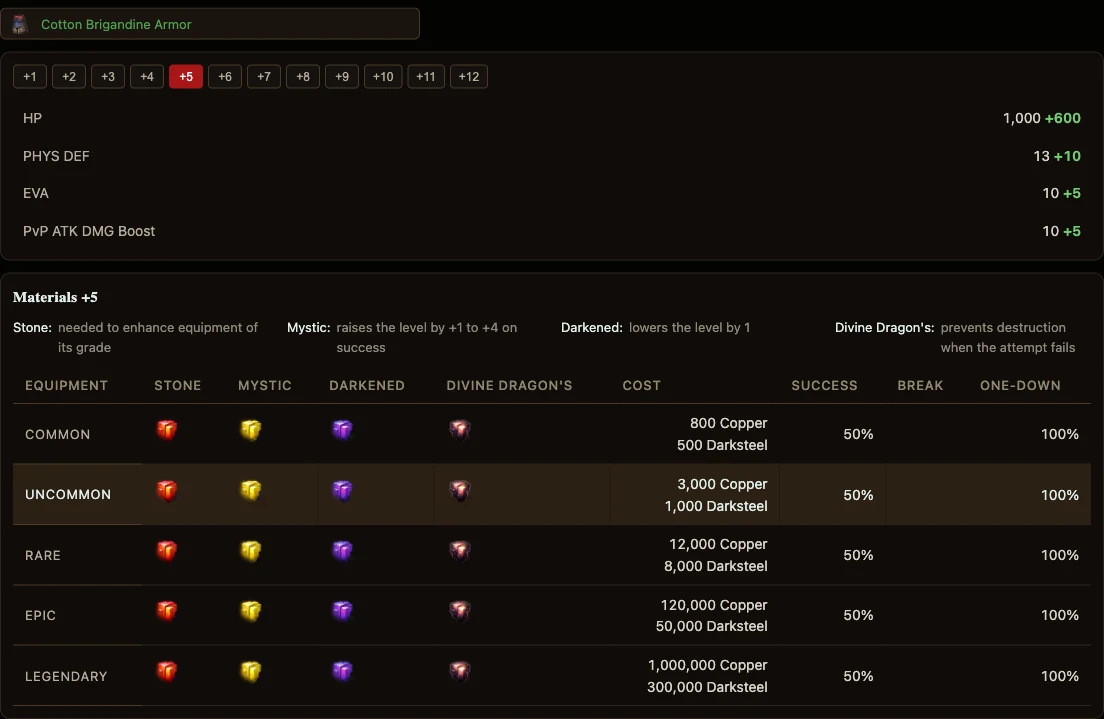
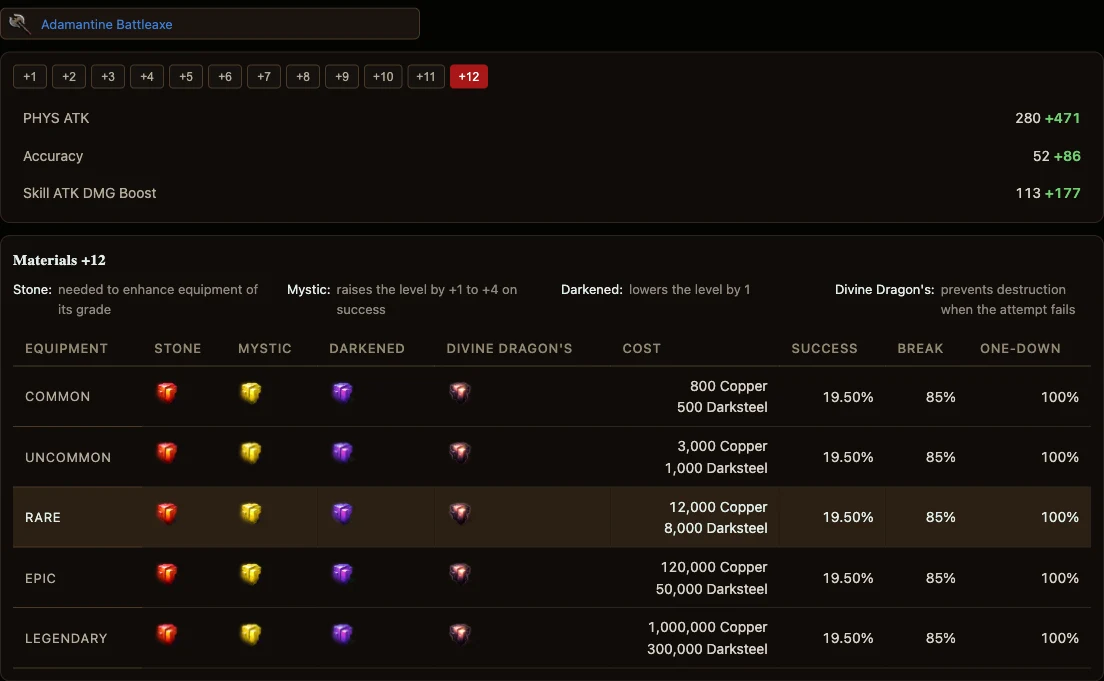
Take Cotton Brigandine Armor. Steps +1 to +4 always succeed and +5 succeeds half the time. The chance then falls to 39% at +6 and 26% at +7, and every step from +8 to +12 sits at 19.5%. Adamantine Battleaxe follows the same ladder. A few helmets and the Blue Dragon set use other ladders, so check the item you plan to enhance. Each attempt also costs Copper and Darksteel. The step table sorts the stones by what their own descriptions say they do. The Enhancement Stone is needed to enhance, a Mystic stone adds +1 to +4 on success, a Darkened stone lowers the level by 1, and a Divine Dragon's stone prevents destruction when the attempt fails.
What do the Break and One-down values mean?
From +6 the table adds a Break chance of 70%, rising to 80% at +7 and 85% from +8, and every step carries a One-down chance of 100%. They share one scale with the success chance, where 100% means the step always succeeds. Success, Break and One-down together pass 100%, so they are not three outcomes of a single roll, and the game data does not say which event each one applies to. The game's own text sets the frame: a failure in the Safe Interval keeps the enhancement level, and a failure in a Danger Zone destroys the equipment unless a Divine Dragon's stone protects it.
Is the next step worth the risk?
The stat strip above the costs shows the item's stats at the chosen step. Move the target step to compare what +8 adds over +5 against the three steps of break risk between them, before a stone is spent.